THANK YOU!!!

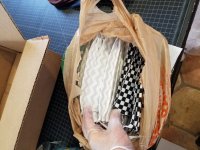
We received about 100 or more masks today and we are SEW grateful!!!!
Shout out to each of you doing your part!
If you don't have supplies, we have the Mask Kits available for purchase. It includes fabric, stabilizer, pipe cleaners (new) and elastic (for as long as we have it). They can be made with ties, as well, if you don't have elastic.
We will have elastic available Saturday, 3/28. First come, first serve and they will be in the kit orders we have received. Each kit is $17 and will make more or less 8 masks, depending on the pattern you use. If you purchase 3 kits, the 4th is donated by us. You can purchase and pick them up or have them shipped to you or you can have some or all of them donated to others who are sewing. The goal is to get them made!
Go to www.wimberleystitchstudio.com and search mask or elastic ... or click the links.
I can't thank you enough for all the support we have been receiving with mask making. We have so many healthcare professionals needing masks and it doesn't look like the need will be diminishing very soon. We all know fabric masks aren't the best at keeping germs (Covid19) at bay, but many are using them over the N95s and other masks to make them last longer and protect them a little more.
I do have a few hints for you:
- I am using the AB Mask because for me and others I've talked to, they are easy to make, big enough to cover an N95 mask, and adaptable for these additions --
- Batik is a little more tightly woven. That is what I'm putting in the kits. Sheets would be tighter so if you are ready to invest in new ones, cut up your old ones.

- 1 or 2 layers of non-woven stabilizer could help protect them. I use one on each fabric.

- Pipe cleaner folded in half and twisted or other soft wire across the nose area placed in the fabric layers. Make sure the ends are folded in well so they don't poke through. This makes it fit better.

- Ties if you don't have elastic, like in the pattern.
- Make the darts.
- If you have elastic, sew the two pieces of fabric right sides together top and bottom only.
- Turn right side out.
- Slip the pipe cleaner in the top next to the seam and zig-zag it securely.
- Make pleats as you like.
- Add the non-bias binding to each side to create a channel to insert elastic (not tight). I use 2 inch widesewn to front, turned to the back and stitch down.

- Insert about 27-30 inches of elastic down one side of the binding and up through the other side. Tie the ends together. This will allow it to slip over the head and around the back. I also have this corded elastic that I got in today and it seems strong and is comfortable around the head.
- If your elastic is limited, slip about 8 inches through one side and knot it and another 8 inches in the other side. This will slip over their ears.
We sure miss seeing all of your smiling faces in the shop. Thank you to everyone who has called, texted and emailed. We are so blessed to call you friends! When this is over, we are all going to celebrate!
Here is a smile for you!

Love and prayers from Rich and Linda